
 Salon Plaza’s Salon Owners – Member Exclusive:
Once you set up your Salon Plaza personal website, you can link to your Facebook page. This post will show you how to set up your Facebook business page, step-by-step.
BONUS: Want FREE Publicity?
After you’ve linked your personal Salon Plaza website to your Facebook business page, let us know in the ‘Comments’ below…
We’ll feature you on our Salon Plaza Success Blog!
Here are some questions Salon Plaza Members have been asking about Facebook:
- Why should I showcase my services on Facebook – is it worth my time and effort?
- What’s the best way to distinguish myself from sooo many other local salon professionals on Facebook?
- How can I post fascinating, captivating, valued messages for my visitors?
- What FREE and FEE ways can I attract new LIKES to my page?
More FAQs – Frequently Asked Questions coming soon!
Subscribe via E-mail to be among the first to know!

If you’ve been waiting set up your Facebook page until you really know how to do it right, NOW is the time! (If you’ve already set up your page, glance through this post to make sure you got the details right – it will help you get found.)
To Set Up Your Facebook Page, Follow This Step-By-Step Recipe:
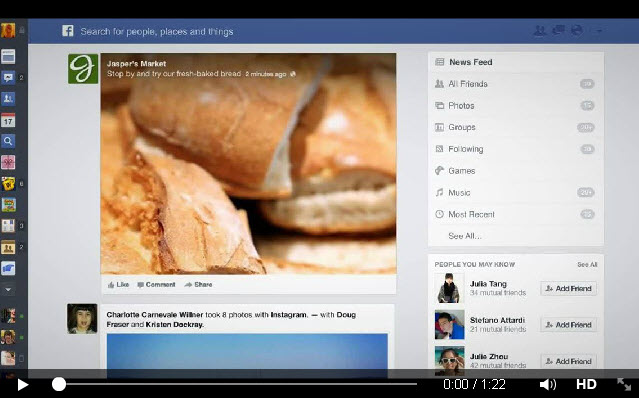
1. Start by watching this video about Facebook pages – It’s only 1.22 minutes long.
2. Now you’re ready to get started. Go now to Facebook and set up your Facebook page.
3. Because you are a salon owner, click on ‘local business’:
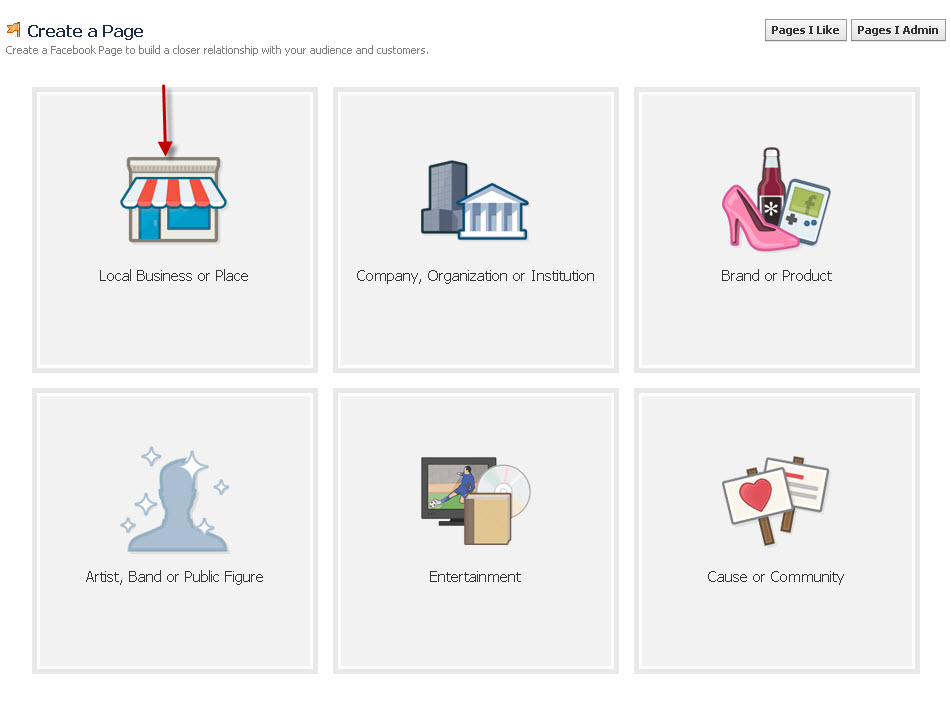
4. Click on ‘local business or place’ and fill in the fields.
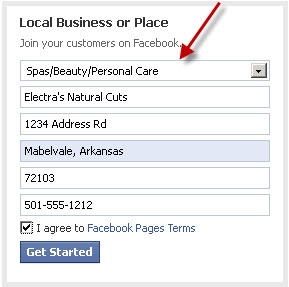
5. Click ‘get started’, which will take you to Section 1 – About.
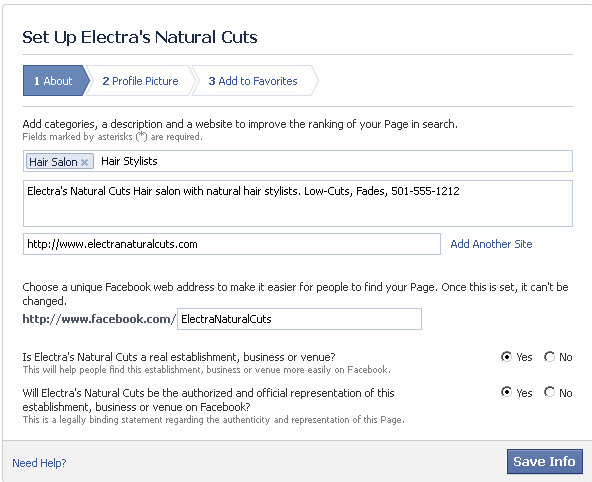
Enter your keywords so people can find you when they are searching for services like yours. ‘Hair Salon’ is a popular search term in Facebook’s database so include it as one of your keyword phrases. Be sure to include your business phone number and your Salon Plaza website.

6. This page will expand for you to answer the last two questions.
7. Click ‘save info’ and you’ll be on Section 2 – Your Profile Image.
Your profile picture must be at least 180 pixels wide. Use your business logo, a signature hairstyle, or the same photo as on your Facebook personal profile. Whichever you choose, plan to use the same, consistent image with all of your social media profile pictures.
Facebook will ask if you want to add your page to your Favorites – I recommend this.
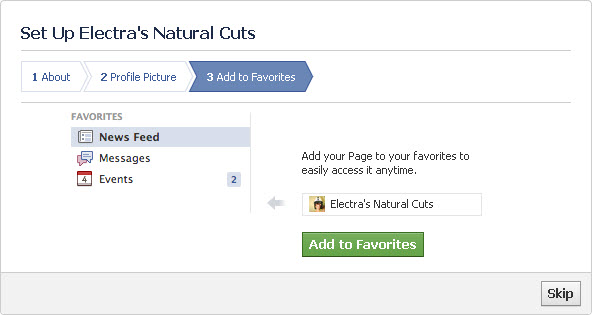
9. Click ‘Add to Favorites’, save your choices, and then ‘add a cover’.
Cover photos are 851 pixels wide and 315 pixels tall. If you upload an image that’s smaller than these dimensions, it will be stretched to this larger size.
If you are wanting a few tips on how to create a cover image that helps you to build your business, a special post is coming soon on the new Facebook Cover Rules.
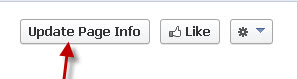
10. Now it’s time to click on ‘update page info’
Edit your settings as needed. Think about how you want your audience to post on your page. Do you want them to post pictures? This is the area for you to set boundaries for how you want visitors to engage with you on your page.
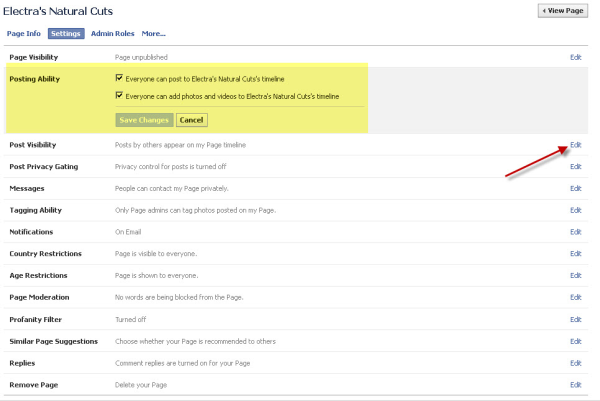
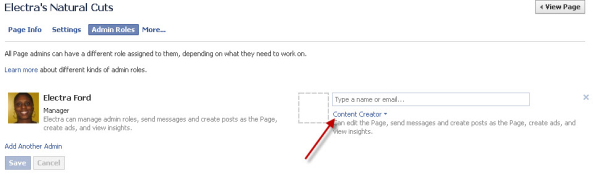
Note: As your business grows you may want to ask someone else to manage your Facebook page. To do that, first ‘Friend’ her/him on Facebook. Now click on ‘manage admin’ and add as administrator.
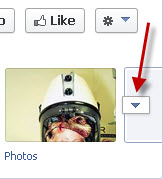
11. To enhance your visitors’ experience on your page, add tabs.
Click on the tab drop down menu and expand your tab options as show below:
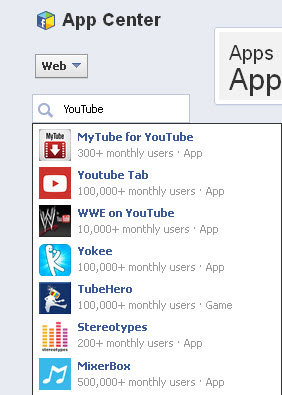
Now click on the + sign then click on ‘Find More Apps’.

Do you have a YouTube channel?
You can connect your Facebook visitors to your Youtube channel.
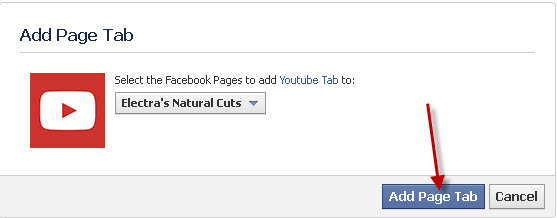
Here’s how to add an app to a tab – specifically, the YouTube app. When you click on ‘Find More Apps’, the App Center will load. Type in the name of the the app you want. For this example, type YouTube and choose the second app, “Youtube Tab,” which I recommend.
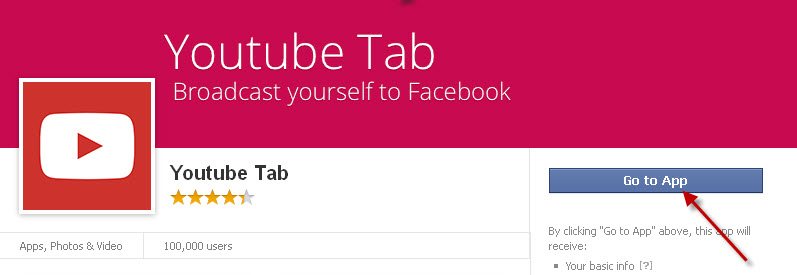
Click on the ‘Go to App’ button and then click the ‘Install Application’ on the next page.
 After you click the ‘Install Application’, follow the instructions to add the app to your page. (If you manage more than one page, select the page you want.) Now click ‘Add Page Tag’.
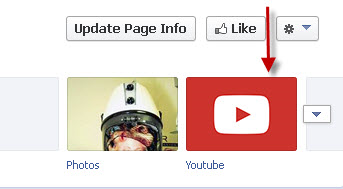
To make sure you’re connected, go to your Facebook page and see that the YouTube app is added to your tab.
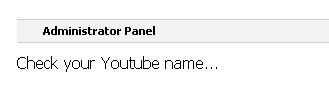
Now do the reverse – Connect your YouTube channel to you Facebook page. First click on the Facebook tab to edit the settings. Then click on the words ‘Administrator Panel’
 Next, add your YouTube Channel’s name. Paste the link of the video you want your visitors to see first. Adjust the ‘Player theme’ to dark or light, then click ‘save settings’.
 When your visitors click on your YouTube tab, your highlighted video will display.
12. Build your personal brand.
For your first post, start building your personal brand on Facebook. For instance, upload an image that describes your work. Include your Salon Plaza website address, such as http://www.salonplaza.wpengine.com/your-name.

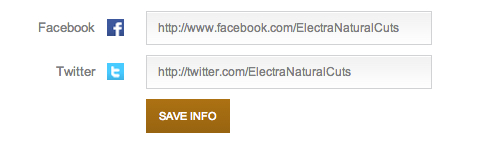
13. Connect your personal website with your Facebook page:
Log in to your Salon Plaza Member Account. Scroll down to the bottom and add your Facebook URL. If you are active on Twitter, connect to your Twitter account as well. Click SAVE INFO and these links will become active on your personal Salon Plaza website.
Salon Plaza Member Exclusive:
Follow these steps to create your Facebook business page. As soon as you go live and post your first message, let us know in the ‘Comments’ below…
We’ll feature you on our Salon Plaza Success Blog!
![]()